TL;DRBuying and installing your travel eSIM at home 48 hours before departure does not start your data clock — but it does mean you skip the worst place on Earth to set up an eSIM, which is an airport.
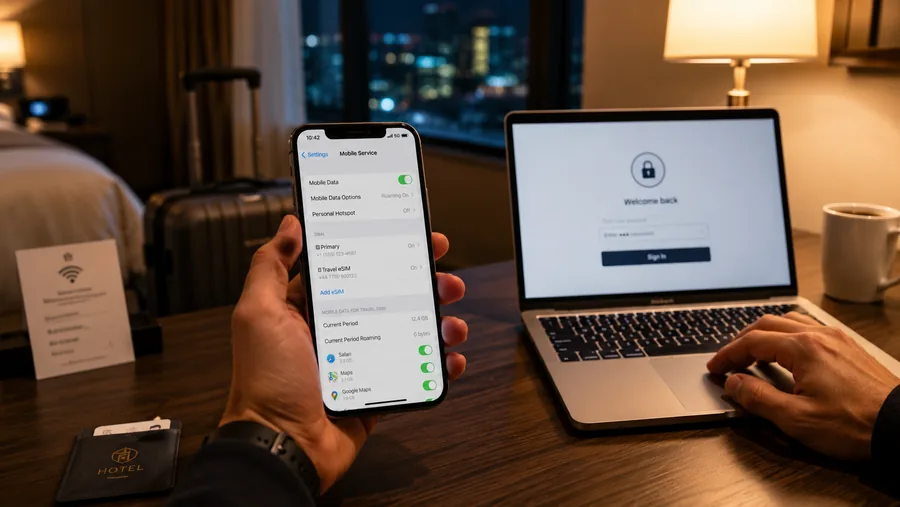
Here is the technical fact that makes this whole tip work: installing an eSIM and activating it are two different events. Installing happens when you scan the provider's QR code at home — the profile downloads from the carrier server onto your phone. Activating happens later, the first time that profile connects to a partner network at your destination. On every major provider — Airalo, Holafly, Saily, Nomad, Ubigi, GigSky — installing the eSIM at home does not start your data plan's countdown.
This is the entire reason "buy 48 hours before, install at home" is the right move. There is no downside. Your plan starts when you land. Meanwhile, you've already done the only step that can fail.
Why the airport is the worst place to do this
An eSIM profile download requires a working internet connection. The QR-code scan itself is offline, but the profile pull is not. Which means you need WiFi or another data connection to install — and airport WiFi is uniquely hostile to this step:
- Captive portals. Most airport WiFi makes you accept terms or sign in via a browser before the actual data path opens. iOS and Android often try to detect this with a hidden test request; sometimes that test fails and the WiFi indicator says "connected" while no real connection exists. The eSIM install hangs forever.
- Weak signal and packed channels. A baggage hall with two thousand other phones trying to text loved ones is one of the worst real-world RF environments. The connection lights up but doesn't carry useful throughput.
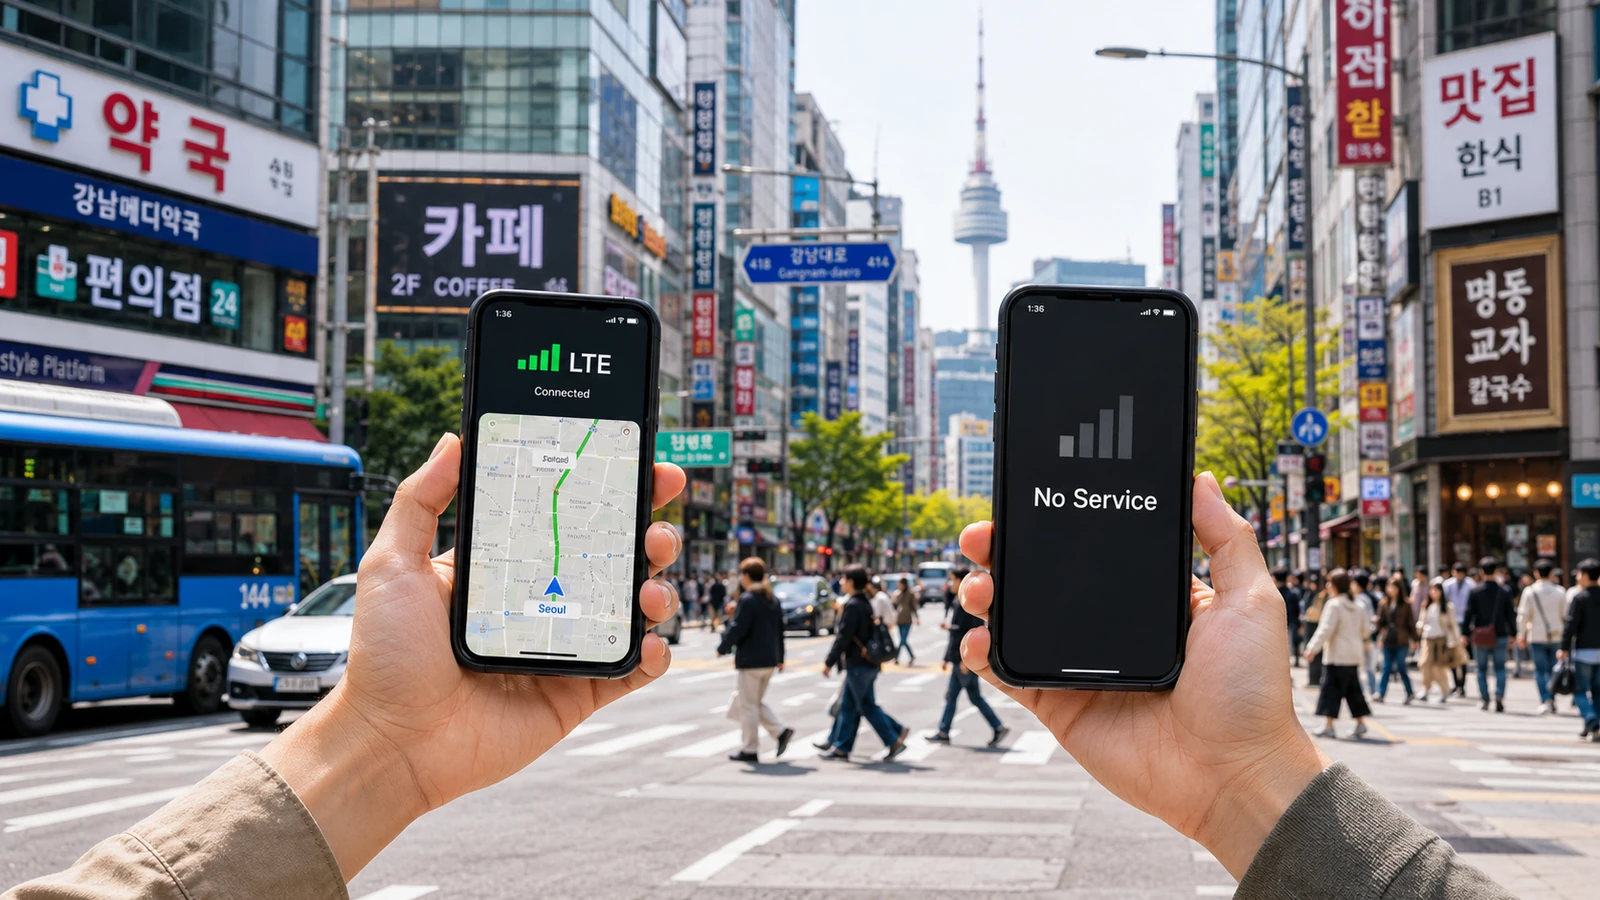
- You don't have an alternative data source. Your home cellular probably won't reach the gate, your roaming hasn't kicked in (which is the whole reason you bought the eSIM), and there's no friend nearby to tether off. If install fails, you're stuck.
By contrast, installing on your home WiFi the night before is boring and works every time. Install once, then leave the eSIM profile inactive in Settings until you board.
Will my phone work with a travel eSIM?
Compatibility on Apple devices is broad. Every iPhone from iPhone XR / XS (2018) onward supports eSIM. US-sold iPhone 14 and later are eSIM-only — they have no physical SIM tray at all. The main gotcha is carrier locking: an iPhone bought subsidized through a US carrier may be locked, and a locked iPhone will refuse to install a third-party eSIM until it's unlocked. To check, open Settings → General → About and scroll to "Carrier Lock." You want to see "No SIM restrictions."
On Android, the story is messier. Pixel 3 and later support eSIM almost everywhere they're sold. Samsung Galaxy S20 and later support eSIM globally, but US-sold Samsung units have historically had eSIM disabled by carrier firmware on many models — and Samsung quietly enables it on some over time. Before paying for a travel eSIM, check yours: Settings → Connections → SIM Manager → look for "Add eSIM." If that option exists, you're fine.
Provider snapshot (verify prices day-of)
The eSIM market moves quickly — prices and plan structures change often enough that any number you read in a blog post is suspect within a quarter. As of May 2026, here's the landscape:
- Airalo — the most popular marketplace, 200+ countries, fixed-data plans. Japan starts around USD 4 for 1 GB / 7 days; EU regional plans also start around USD 4. Earlier this year Airalo raised Japan unlimited from about USD 15 to USD 27 (7-day) and from about USD 35 to USD 74 (30-day), so check live before buying.
- Holafly — unlimited-data specialist with day-based pricing. Thailand around USD 3.90/day or about USD 51 for 15 days. 5G on every plan. Best fit if you stream a lot or hotspot for a laptop.
- Saily — owned by NordVPN; aggressive on price. Thailand 1 GB / 7 days around USD 3, unlimited 7 days around USD 29. Bundled VPN-style features.
- Nomad — mid-range pricing with strong Asia coverage and a simpler app than Airalo's marketplace UI.
- Ubigi — carrier-grade infrastructure, often pre-loaded on iPads and electric vehicles. Useful when other providers' coverage is spotty (cruise ports, rural Latin America).
- GigSky — older player, distinctive for cruise/in-flight plans.
Plans are nearly all data-only. You do not get a local phone number, you cannot receive SMS sent to that number, and traditional cellular voice calls won't route through the eSIM. The workarounds are: keep your home SIM active in another slot to receive 2FA texts (your home carrier will bill you roaming for that — usually a few dollars per day or a flat add-on), or use WhatsApp, iMessage, FaceTime, or Signal calls over the eSIM data, which works great.
Free and cheap alternatives
If you want to avoid paying anything, the realistic options are:
- Airport carrier kiosks. Still exist at major hubs — TrueMove and AIS in Bangkok, Sakura Mobile in Tokyo, Telcel in Mexico City, KPN/Vodafone in EU hubs. Lines after a long-haul flight regularly run 30–60 minutes, and you'll pay 2–4× what a comparable eSIM costs. Worth it if the eSIM install genuinely fails.
- Hotel and cafe WiFi for the first hour. Fine for getting set up. Skip anything sensitive until you have your own data (see our eSIM over hotel WiFi for sensitive stuff tip).
- Referral credits. Most providers offer a small credit (typically USD 3) for a new account via a referral link. Enough for a starter 1 GB plan in many countries.
Common pitfalls
- Trying to scan the QR code on the phone you're installing on. Already covered — use a second device or print it.
- Deleting the eSIM after the trip. Most providers tie the profile to a one-time install. If you delete it before the plan expires, you may have to repurchase to get it back. Instead, just turn off the eSIM in Settings; it stays installed for the next trip's data top-up.
- Assuming activation = install. Most providers don't start your countdown until the eSIM touches a partner network at the destination — but a handful of smaller marketplace sellers DO start counting the moment you scan the QR. Read the plan terms before scanning if you're not on a top-five provider.
- Carrier-locked iPhone. Confirm "No SIM restrictions" in Settings → General → About before paying. If yours is locked, your home carrier can usually unlock it for free after a few months on account — request before the trip.
- Forgetting your eSIM after landing. When you board, switch your home line to "off" (or set your travel eSIM as the default data line). Otherwise your phone keeps trying the home carrier and racks up roaming charges before you notice.
Bottom line
Buy the eSIM at home. Install it on your couch with reliable WiFi. Leave the profile in Settings, switched off. When the plane lands and you turn airplane mode off, flip the travel eSIM on as your data line and you have working data before you've reached the baggage carousel.
This is one of those rare travel tips where the right move is also the easiest one — provided you do it 48 hours before instead of 48 minutes after.